E30.BMWdiy.INFO
E30 Lighted Rearview Mirror Retro-Fit
Prepared by VietSB
Modified 04.19.03
(Cabriolet contribution by TNTS325ic)
NOTE: Perform these steps at your own risk. All P/N's listed are a "best guess", so please double-check with your local dealer. These mods and repairs were performed on my US-Spec 1989 325i (12/88 prod date, M20/B25 engine) but there is no guarantee they will work on other E30's. These instructions are provided for entertainment purposes only!
BACKGROUND: It can be fairly frustrating when the only interior lighting is the two side headliner lightpods. In response, I found a used lighted mirror and proceeded to install and wire it up.
If
Required Parts:
- P/N 51 16 1 906 525 Interior rearview mirror with maplights (~$80 used or ~$150 new)
- Short length of ~18AWG wire (speaker wire works)
- Female connector plug and pins to match the attached harness. If you can't a prefect match, a 2-pin Molex #WMLX-101 connector works.
- (2) Wire taps
- Electrical tape

Required Tools:
- Multi-meter
- Wire cutter
- Wire stripper
- Soldering equipment
- Precision screwdrivers
- Crimping pliers
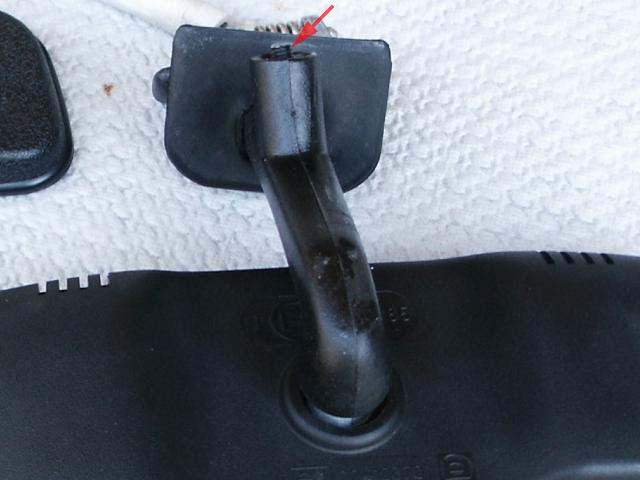
1. Before purchasing a used mirror, be sure it includes the thumbscrew that pushes against the windshield to prevent vibration. Because the mirror is heavier, vibration is a serious issue without this piece. The pic below shows a mirror with missing thumbscrew.
Please Note: Cabriolet owners will notice this mounting arm won't work on their cars. You will need to use the cabriolet arm instead which is beefier and can dampen the vibration without resorting to the thumbscrew. Click here for an excellent cabriolet install and wiring write-up by TNTS325ic.
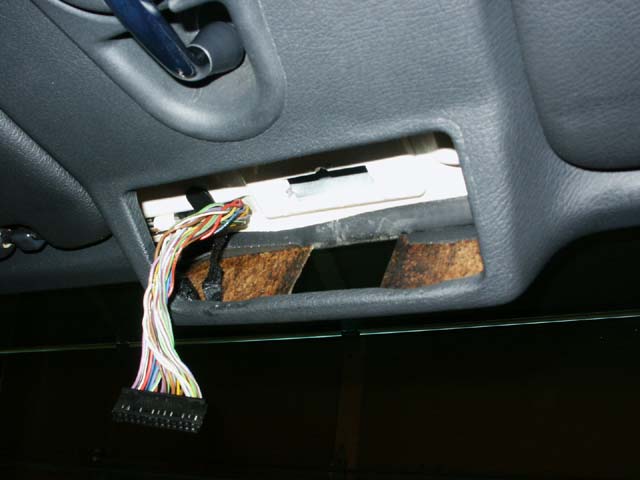
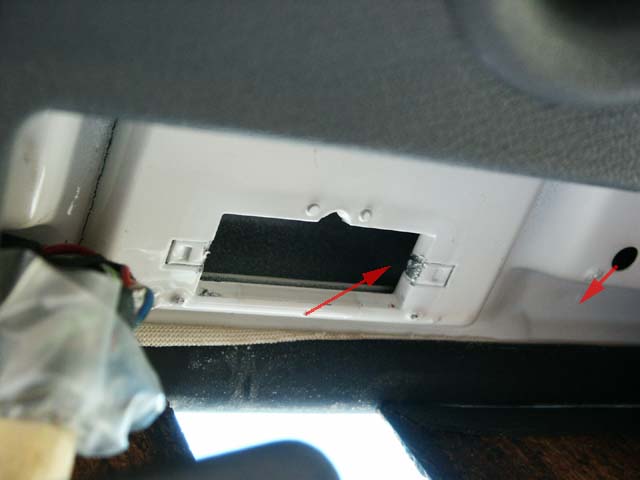
2. Remove the Active Check Control panel by slowly prying out the bottom flange till it releases. Unplug the wiring harness and completely remove the panel. Loosen the rubber grommet that hides the mirror stalk as it heads into the front headliner. The mirror removes by simply yanking it with some force till one of two spring-loaded pins retracts and the mirror pops off. Pulling it to one side or the other usually works for me.
Use a precision Philips-head screwdriver to remove the right-angle wiring cover over the harness to expose the plug.
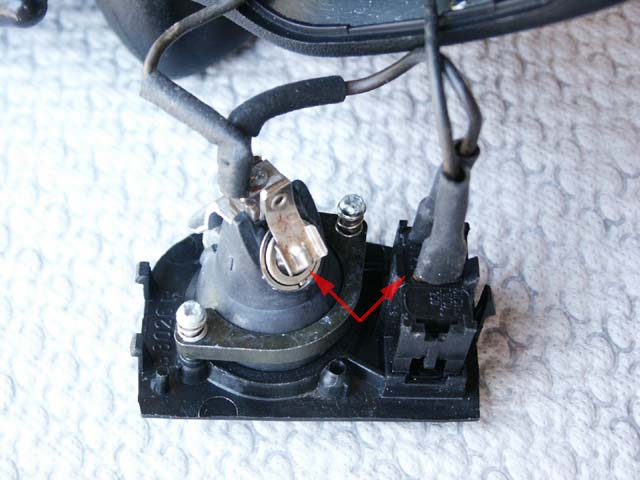
3. The lighted mirror has a short attached wiring harness for power. I pried out one of the light modules and used the multi-meter to determine which lead from the harness corresponded to the positive leads (see red arrows).
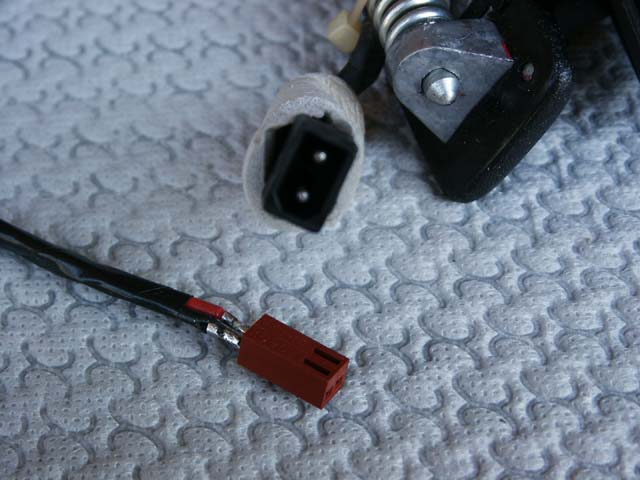
4. Using that information, I wired the 2-pin Molex connector which mates with the attached wiring harness (pictured). It's not a perfect fit between the two plugs, but they will lock in just fine. Another option would be to cut or splice into the mirror wiring, but I chose to keep it semi-stock. Use the ~18AWG wire to build the Molex adapter and leave the length long enough to splice into the Active Check Control wire harness as outlined below. Wrap the first 3-4" of wire with electrical tape for protection when routing.
5. Route the cut ends of the new harness into the rectangular opening and back out thru the hole as pictured below. I might have used a zip tie as fish tape or possibly back-fed the wires before inserting them into the Molex plug. Leave a bit of slack in the wiring as shown in the 2nd pic below.
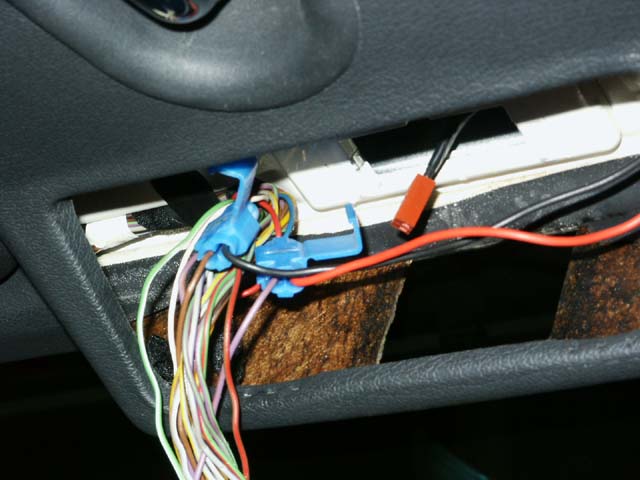
6. Use wire taps to connect the cut ends of the new harness to the Active Check Control wiring. Tap the negative lead into the brown ground wire coming off pin 9 in the harness.
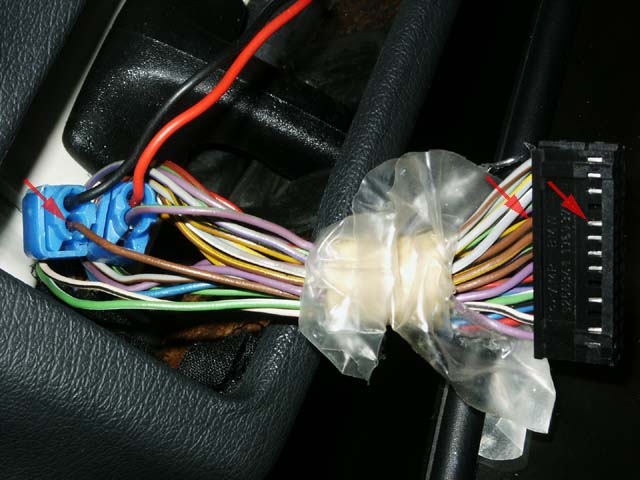
7. If you'd like the lights to be functional only when the key is turned, tie the positive lead into the violet/green-striped wire coming off pin 23 in the harness (see red arrows). If you'd like the lights to be available at all times, tie instead into the red/green-striped (pre-1987 models) or red (1987+ models) wire coming off pin 15 in the harness (see blue arrows).

8. Plug the Molex connector into the short mirror harness and push up on the mirror till it snaps into place. Getting the mirror snapped back into place might prove to be difficult. My advice is to wedge one side in first, then force the other spring-loaded side in. Take your time and use good judgement. Carefully reinstall the right-angle wiring cover over the plug and reconnect the Active Check Control panel to check for functionality of the panel and map lights in the mirror.

9. Remember to install the Active Check Control panel by fitting the top section first, then pressing the bottom flange in.
|
Questions? Comments? E-mail me:
|
 . .
|
Click Here to return to the Main Menu.

Optimized for 800x600 or higher resolution.
Copyright © Midnight Designs, 2002-2003. All Rights Reserved. All
images and registered trademarks are used to benefit and without intent to
infringe on the holder. Contents Subject to Change Without Notice.