E30.BMWdiy.INFO
E30 LED Key Conversion
Prepared by VietSB
Modified 03.01.06
(Thanks to Jeff Krause for pioneering this mod
and Ryan325e for the Digi-Key lead.)
NOTE: Perform these steps at your own risk. All P/N's listed are a "best guess", so please double-check with your local dealer. These mods and repairs were performed on my US-Spec 1989 325i (12/88 prod date, M20/B25 engine) but there is no guarantee they will work on other E30's. These instructions are provided for entertainment purposes only!
THE GOAL: Chances are the little incandescent bulb in your original BMW key burned out years ago and finding a suitable replacement bulb at your local Radio Shack hasn't turned-up any good leads. I'm sure a trip to the dealer will produce a replacement bulb or key light assembly...but at a cost. Here's how to replace the bulb with a Light Emitting Diode (LED) that will last for years or decades. Here's one of the links to the original post.
Required Parts:
- 5mm (T1-3/4) bright (high MCD) LED rated for 1.7V-3.7V ~20mA.
- High-output Digi-Key 67-1612-NDM 2800MCD 30mA 1.7V 30° Viewing Angle red LED (Works great for me, but had to buy in bulk to be cost-effective.)
- Medium-output Radio Shack 276-316 2600MCD 20mA 3.7V 30° Viewing Angle blue LED (Looks cool, but it's not quite bright enough - see pic below.)
- High-output(?) Radio Shack 276-307 3000MCD 20mA 1.7V 12° Viewing Angle red LED (Untested, but very narrow viewing angle.)
- A 16mm 3V coin-size lithium battery
- Easy to find 55mHa CR1616 battery
- Harder to find 125mHa CR1632 battery (Again, had to buy in bulk to be cost-effective.)
Required Tools:
- X-Acto® knife
- Small standard screwdriver
- Wire cutters
- Soldering equipment (optional)
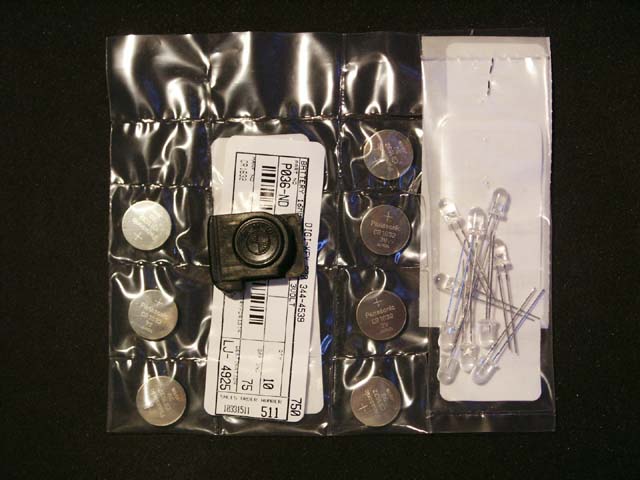
I ordered 10 sets of the CR1632 batteries and 2800MCD red LEDs from Digi-Key. I changed LED colors because the output of my original blue LED was just "okay" and the Digi-Key tech verified that blue and white LEDs normally require the higher ~3.7V voltages. Since I can't find a 6V lithium battery (it seems to be okay to overdrive them) that will fit and I can't stack (2) 3V batteries, I switched to a lower-power, higher-output red LED.
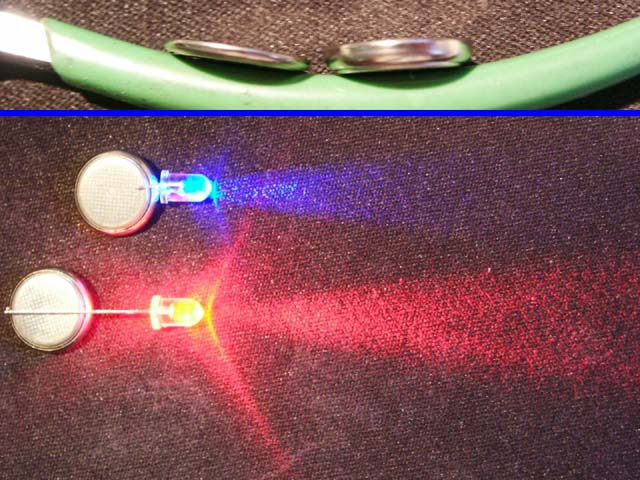
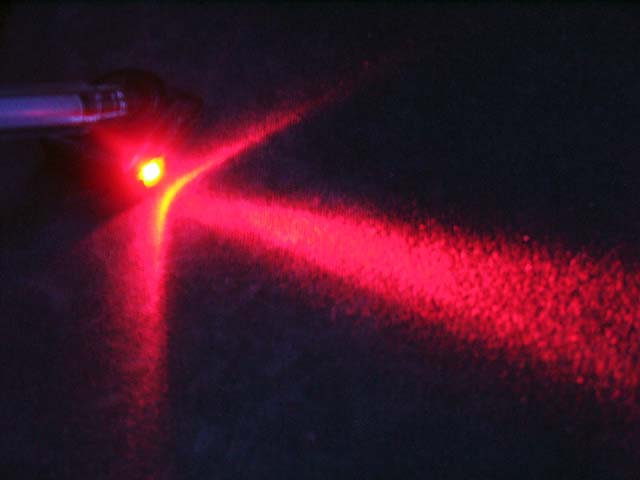
The top picture shows the size difference between a new and original lithium battery. Bottom pic shows a relative light output difference between the blue and red LEDs I've tried.
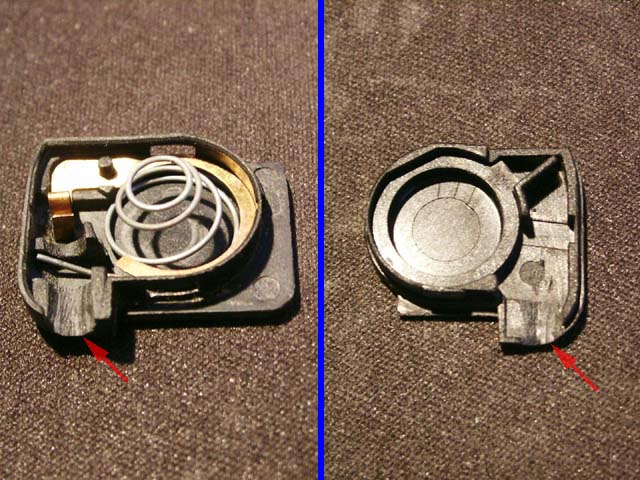
1. Depress the BMW roundel and slide the light mechanism sideways to remove it from the key. Carefully use the screwdriver to depress the two mounting tabs on either side while applying slight force to separate the two halves. If the pieces don't fly apart, inside you'll find a small incandescent bulb, thick lithium battery, copper metal contact piece, and silver spring. Discard the bulb, recycle the battery, and remove the copper and silver spring pieces.
2. Use the X-Acto® knife to enlarge the bulb opening in the upper and lower plastic pieces. Take your time and test-fit regularly with the LED to get a perfect fit. The LED flange should be positioned just inside the housing lip.
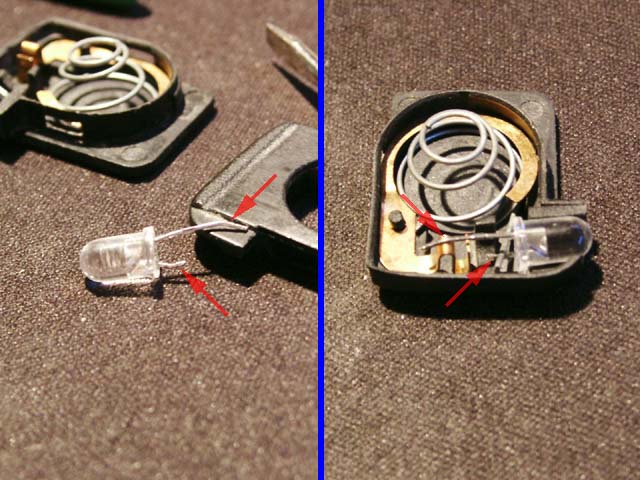
3. The LED generally has an anode (longer) and cathode (shorter) leg which indicates polarity. Using the lithium battery, contact the anode to the (+) side and cathode to the (-) side to check the polarity and component functions.
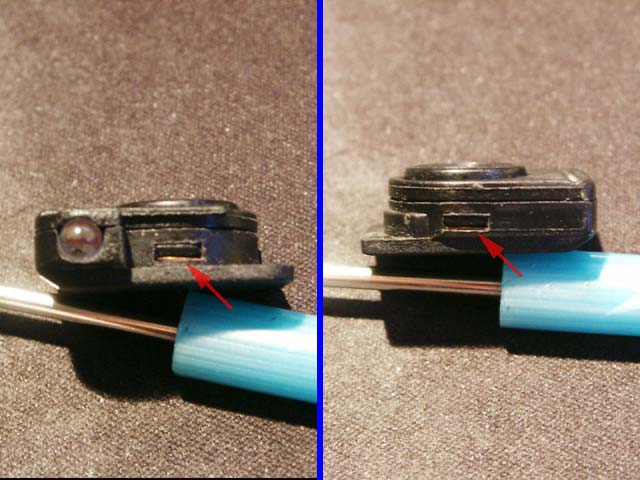
4. Using the pic below as a reference, cut the shorter cathode leg (left lower arrow) so it cannot come in contact with the copper piece. Place the LED into the housing and reinstall the silver spring so the bent arm of the spring sits on top of the cathode (right lower arrow). If necessary, slightly bend the cathode upwards to ensure proper contact. Do not over-bend the leg as this might cause misalignment of the components.
Reinstall the copper piece so the anode leg rests on top of it (right upper arrow). Again, slight bending might be necessary to ensure proper contact. Trim off any excess anode leg. Check to be sure the cathode is still touching the silver spring and there is no contact between the spring and copper piece. The copper piece should barely hover above the spring thru its entire circumference.
5. Place the new lithium battery (+) side up onto the spring and center it with the roundel from the upper plastic piece. The roundel should have a keyed tab to help you figure out how it inserts into the upper plastic piece. Carefully squeeze the two plastic pieces together , while maintaining battery and component alignment. Proper placement of all components is crucial or you'll find that pressing the roundel doesn't always activate the LED correctly.

6. (Optional) Re-open the plastic housing and carefully solder the LED leg contact points to the respective spring and copper components. I didn't do so since the anode and cathode contact pressure seemed sufficient.
7. While depressing the roundel, slide the light assembly back into the key housing until it clicks into place.
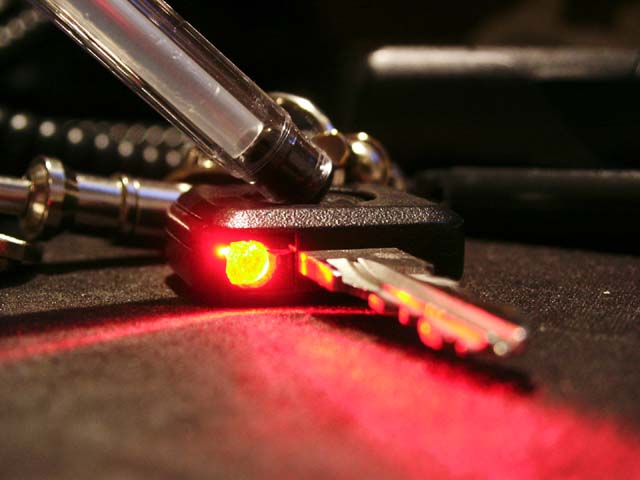
RESULTS
Looks good to me!
|
Questions? Comments? E-mail me:
|
 . .
|
Click Here to return to the Main Menu.

Optimized for 800x600 or higher resolution.
Copyright © Midnight Designs, 2002. All Rights Reserved. All
images and registered trademarks are used to benefit and without intent to
infringe on the holder. Contents Subject to Change Without Notice.